
Move it! Migrating A Survey123
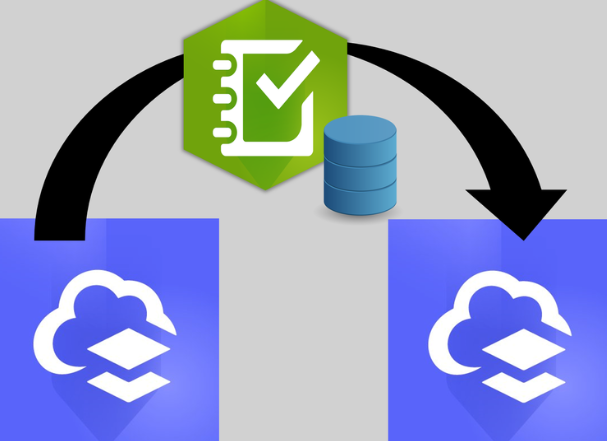
Survey123 has been around for a while and is a powerful tool in the geospatial belt of tools. Whether you're moving projects between ArcGIS Online accounts or just refining your Survey123 presentation, this post walks you through how to:
Recreate a Survey123 form in a new ArcGIS Online account using an existing Excel XLSForm
Re-upload existing survey data into the new hosted feature layer
Use HTML formatting to make numeric scores visually stand out—with color and boldnes

Survey123 has been around for a while and is a powerful tool in the geospatial belt of tools. I created a Survey of Coffee Shops a wile ago and wanted to recreate that with some old data. Whether you're moving projects between ArcGIS Online accounts or just refining your Survey123 presentation, this post walks you through how to:
Recreate a Survey123 form in a new ArcGIS Online account using an existing Excel XLSForm
Re-upload existing survey data into the new hosted feature layer
Bonus of Using HTML formatting to make numeric scores visually stand out—with color and boldness
Step 1: Export from Your Old/Other ArcGIS Online Account
If your Survey123 form was created using Survey123 Connect, you probably already have:
A feature class (downloaded or exported from AGOL)
The original Excel spreadsheet (your XLSForm) used to build the survey
if not, You can ‘Open in Survey123 Connect’ from the AGO interface and then save the XLSX locally. For the Layer from AGO, export the feature layer data as a File Geodatabase, shapefile, or simply use ArcGIS Pro to copy the features. (More on this process below)
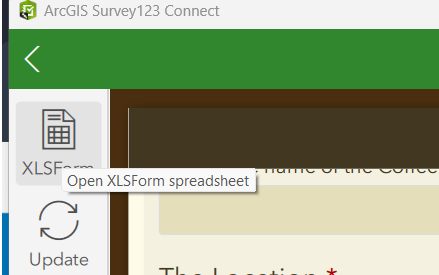
Step 2: Recreate the Survey in Survey123 Connect
Open Survey123 Connect and log in with your target ArcGIS Online account.
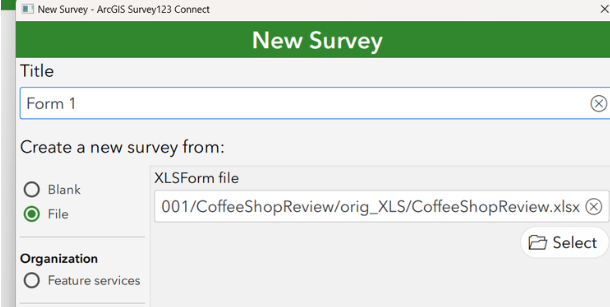
Click "New Survey"
Select the “File” tab, then choose your original Excel XLSForm
Name the survey appropriately because you this name attached it self to a lot of items, and click Create.

This step builds a new feature layer and form structure based on your original XLSForm.
Step 3: Publish the Survey
Once your survey form looks correct:
Click “Publish” to push the survey and create a new hosted feature layer in your new account
Step 4: Migrate the Old Data
Use ArcGIS Pro to migrate the feature class data into the new Published hosted feature layer:
Open a new project and sign in with your target AGO account
Add your original feature class (from download/export)
Add your new empty hosted feature layer (created when you published the survey)
Use the “Append” tool to transfer records with attachments (or Copy/Paste if no attachments)
Make sure field names, types, and domains match—adjust schema if needed. I always map the field on an append.
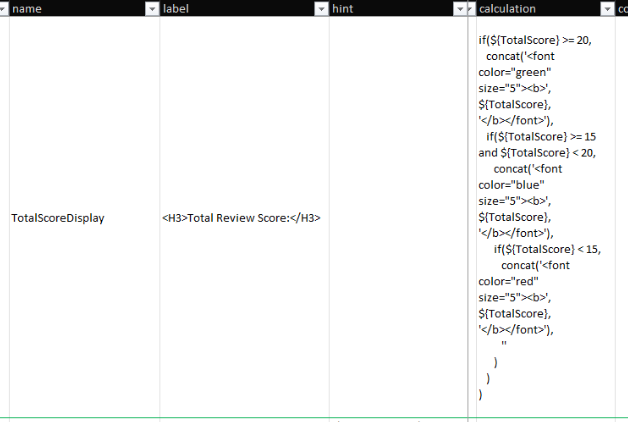
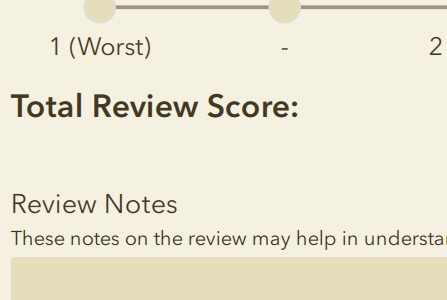
Bonus! Step 5: Add Formatted Score Output with HTML
You can use HTML tags inside a note question in Survey123 to style the output of a calculated score.
For example, to make the TotalScore field change color based on value, and appear bold, use this formula in the calculation column of a note question:
if($ >= 20,
   concat('<font color="green" size="5"><b>', $, '</b></font>'),
   if($ >= 15 and $ < 20,
      concat('<font color="blue" size="5"><b>', $, '</b></font>'),
      if($ < 15,
         concat('<font color="red" size="5"><b>', $, '</b></font>'),
         ''
      )
   )
)
Point of note: For some reason this doesn’t display in the Survey123Connect accurately in the preview, but it works after publishing
Survey123 Connect Preview
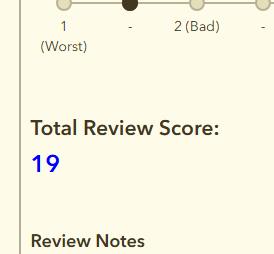
Opened in Browser looks fine and formatting works!
This workflow lets you fully migrate a Survey123 form and its data between accounts and enhance the user experience by formatting key values. Using just a few lines of HTML and Survey123 logic, you can make your forms more engaging, readable, and responsive. If you have any coffee shops you want to review drop them here.
Send us and email if you have any questions

Shared Update is Shared Administration
Here’s the setup: You’ve carefully crafted a web map and application in ArcGIS Online. The data is perfect, the configurations are solid, and you’re ready to share it with your team. But then, you notice something alarming — edits are possible when they shouldn’t be. Despite your best efforts to lock things down, the data is still editable in ways you may not want. This was the exact situation we faced recently. Here’s how we untangled the mystery and discovered (via tech support) a hidden pitfall in group permissions that every ArcGIS Online user should know about.
Geospatial > The Layer File > Shared Update is Shared Administration
Preventing Unwanted Edits in ArcGIS Online: A Support Case Story
Here’s the setup: You’ve carefully crafted a web map and application in ArcGIS Online. The data is perfect, the configurations are solid, and you’re ready to share it with your team. But then, you notice something alarming — edits are possible when they shouldn’t be. Despite your best efforts to lock things down, the data is still editable in ways you may not want.
This was the exact situation we faced recently. Here’s how we untangled the mystery and discovered (via tech support) a hidden pitfall in group permissions that every ArcGIS Online user should know about.
It’s right there! Just click it!
The Puzzle Begins
Our journey started with two accounts: an admin account and a creator role responsible for Editing ATTRIBUTES of a hosted feature layer in an Experience Builder application. Our goal was simple:
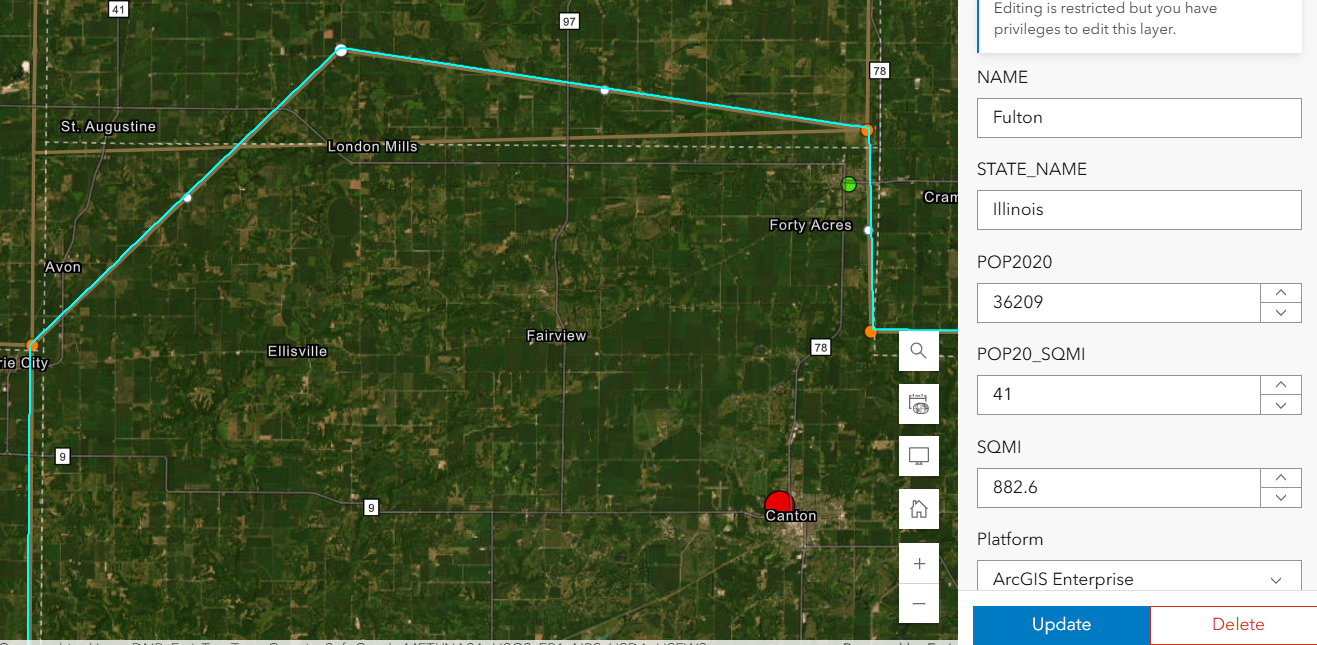
Welp. That’s not supposed to happen….
Prevent Geometry Changes except for the admin or data owner. No sweat right? Just set that variable in the Feature layer’s settings. Done- Duh.
Except, after using the Admin to set that option , my Creator user could still add, delete and change the geometry.
We double-checked everything:
Just for fun, we totally disabled editing in the hosted feature layer settings — check.
The Experience Builder edit widget was configured to prevent edits — check.
Yet, somehow, edits were still possible. It didn’t make sense. We were sure we had all the right settings in place, but the problem persisted. The Creator user could edit vertices in the webmap AS WELL AS resize polygons in the Experience Builder application. In fact that Creator user could change these settings as well as add fields or enable attachments on a layer it did not own.
Digging Deeper
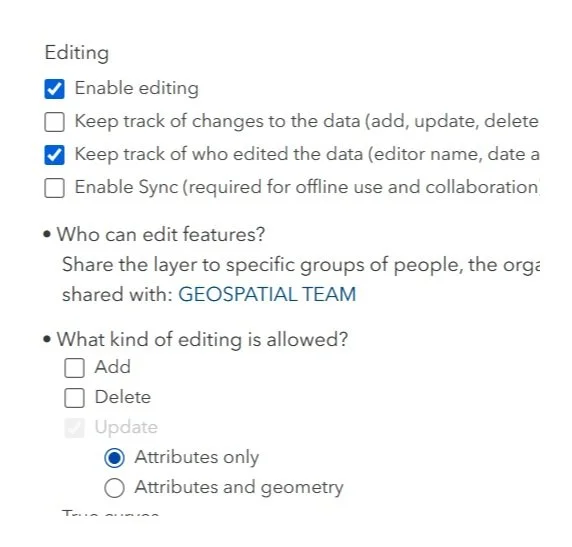
After some thorough troubleshooting with Esri Tech Support, the only commonality was that the users were both a part of the same group. The web map, app, and layers were all shared with this group — a shared update group, to be exact.
For those unfamiliar, shared update groups are powerful collaboration tools in ArcGIS Online. They allow multiple people to edit items shared within the group. However, with great power comes great responsibility (and a potential for unintended consequences).
Esri’s documentation on creating groups carries this important caution:
Caution: A shared update group allows all members to edit items shared with the group. Be careful when enabling this capability, as it overrides individual item settings for editing. …members of this group also have elevated privileges, such as the ability to edit the contents of hosted feature layers, append and update a hosted feature layer using the content of a file, alter editor tracking settings, enable or disable attachments, and alter the layer's schema.

Despite our feature layer and widget settings, the shared update group’s permissions were overriding everything, allowing geometry edits to slip through. The fact that the setting disallows adding, deleting, or changing geometry, means nothing. The layer being shared with a ‘shared update’ group overrides ALL those settings!
Finding the Solution
With this realization, the path forward became clear. We needed to change how we were sharing the content. Here’s what we did:
Created a new group without shared update privileges.
Shared the web map and app with this new group instead.
Tested it — and this time, with the same user, no unwanted geometry edits!
By removing the shared update capability, we ensured that only the admin or data owner could make changes. The issue was finally resolved.
This experience highlighted an important lesson about managing permissions in ArcGIS Online:

Shared update groups are powerful but can lead to unintended edits. If you don’t need collaborative editing, avoid using shared update groups. Stick to regular groups to keep your content secure.
Taking a moment to review your group settings can save you from unexpected headaches. It’s a subtle but critical detail that can make all the difference in protecting your data.
In the world of geospatial data, collaboration is essential, but so is control. Understanding how permissions work — and how group settings can override individual item configurations — is key to successful content management in ArcGIS Online. Next time you set up a web map or app, ask yourself: Who really needs editing privileges?
Choose your groups wisely, and your data will stay secure.